Preparing References Before Upload
Before uploading your references to SyRF, perform these essential preparation steps:
Contents
1. Deduplicate Your Search Results
If you searched multiple databases, your combined results likely contain duplicate references for the same study.
Important: SyRF does not perform deduplication during the upload process. You must remove duplicates before creating your upload file. Failure to do so will result in multiple entries for the same study within SyRF, complicating your screening process.
- Recommended Tool: We strongly recommend using the free ASySD deduplication tool to automate this crucial step. Other reference management software (like EndNote) also offers deduplication features.
2. Choose and Prepare Your Upload File Format
SyRF accepts two file formats for uploading your deduplicated references:
- EndNote Desktop XML (
.xml): Recommended if you manage your references primarily in EndNote Desktop. - Comma Separated Value (
.csv): A flexible format suitable for spreadsheets or exports from other reference managers (like Zotero). This format also allows the optional inclusion of pre-existing screening decisions.
Option A: Using EndNote XML (.xml)
Compatibility: SyRF only accepts XML files exported directly from EndNote Desktop. XML files exported from EndNote Web or other software are not compatible.
Follow these steps to export from EndNote Desktop:
- Import & Finalize: Ensure all deduplicated references for this Systematic Search are in your EndNote library.
- (Optional) Find Full Text: To attach PDFs within EndNote before exporting, select the relevant references (e.g.,
Ctrl+AorCmd+Afor all), then go toReferences->Find Full Text. (See Managing Full-Text PDFs for details on how SyRF handles PDFs). - Select References: In your EndNote library, highlight all references you intend to upload (
Ctrl+AorCmd+A).Warning: If no references are selected, EndNote might only export the first reference in your library, leading to an incomplete upload.
- Export: Go to
File->Export. - Configure Export Settings:
- Set
Save as type(Windows) orFormat(Mac) toXML (*.xml). - Ensure the
Output styleis set toShow All Fieldsor a similarly comprehensive style to include maximum data.
- Set
- Save: Name your file (e.g.,
ProjectName_Search_Date.xml) and save it. This.xmlfile is ready for upload.
Using Zotero? You cannot use Zotero’s ‘EndNote XML’ export option. If using Zotero, please export your library as a CSV file and follow the instructions in Option B below.
XML Upload Error? Refer to the SyRF FAQ for troubleshooting common XML upload issues.
Option B: Using a Spreadsheet CSV (.csv) (With Optional Screening Decisions)
Note: This option is recommended if you are not using EndNote or if you want to include pre-existing screening decisions in your upload.
You can prepare your reference list using spreadsheet software (like Microsoft Excel, Google Sheets, LibreOffice Calc) and save it as a .csv file.
- Create Your Spreadsheet: Open a new or existing spreadsheet.
-
Required Column Headings: Your spreadsheet must include the following column headings exactly as spelled and cased. Include all columns, even if you don’t have data for every field for every reference.
Column Name Description Title Title of the study Authors Authors separated by semicolons, e.g., Smith J; Doe APublicationName Journal or publication name AlternateName Alternative name(s) for the study (if any) Abstract Study abstract Url Web link to the study (if available) AuthorAddress Corresponding author’s address Year Publication year, format: YYYY(e.g.,2023)Doi Digital Object Identifier ReferenceType Reference type (e.g., journal article, book) Keywords Relevant keywords separated by semicolons PdfRelativePath Relative path to associated PDF CustomId Optional identifier for your own reference to be included in SyRF data exports Systematic Search CSV Upload Template: A template CSV file with the correct headings and example data is available: Download Template
- Populate Data: Fill in the reference details under the corresponding headings. *Empty Fields: It’s acceptable to have empty cells if data is missing for a particular reference. Do not delete the columns themselves.
- (Optional) Include Pre-existing Screening Decisions:
- If screening was partially done outside SyRF, you can import these decisions. Add a separate column for *each screener whose decisions you want to import.
- Name these columns descriptively (e.g.,
Screener_Alice_TitleAbstract,Screener_Bob_FullText). You’ll map these to SyRF users during the upload. *Use1for inclusion and0for exclusion in these columns. Leave cells blank if no decision was recorded for that screener/study; they will be ignored.
- Remove Extra Columns: Ensure your file only contains the required columns listed above, plus any optional screening decision columns. Extraneous columns can cause errors or invalid data during upload.
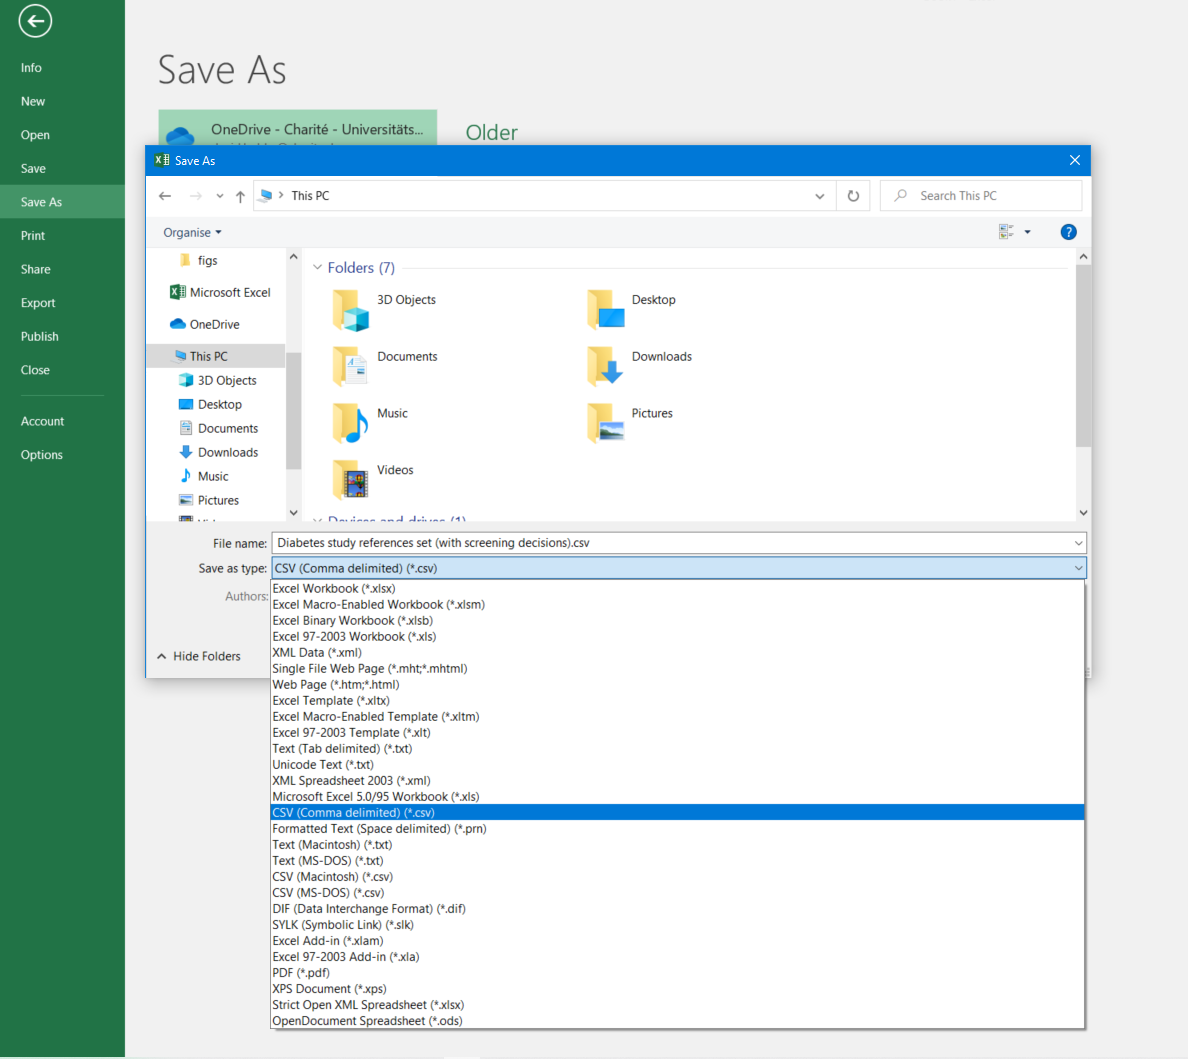
- Save as CSV:
- In your spreadsheet software, choose
File->Save AsorFile->Download. - Select the file type CSV (Comma delimited) (*.csv) or CSV (Comma Separated Values) (*.csv). Encoding should typically be UTF-8 if prompted.

- In your spreadsheet software, choose
Next Steps
Once you have prepared your references file, proceed to the Upload Process to add your Systematic Search to your SyRF project.